Techpod Drone ready-to-fly to Belize!
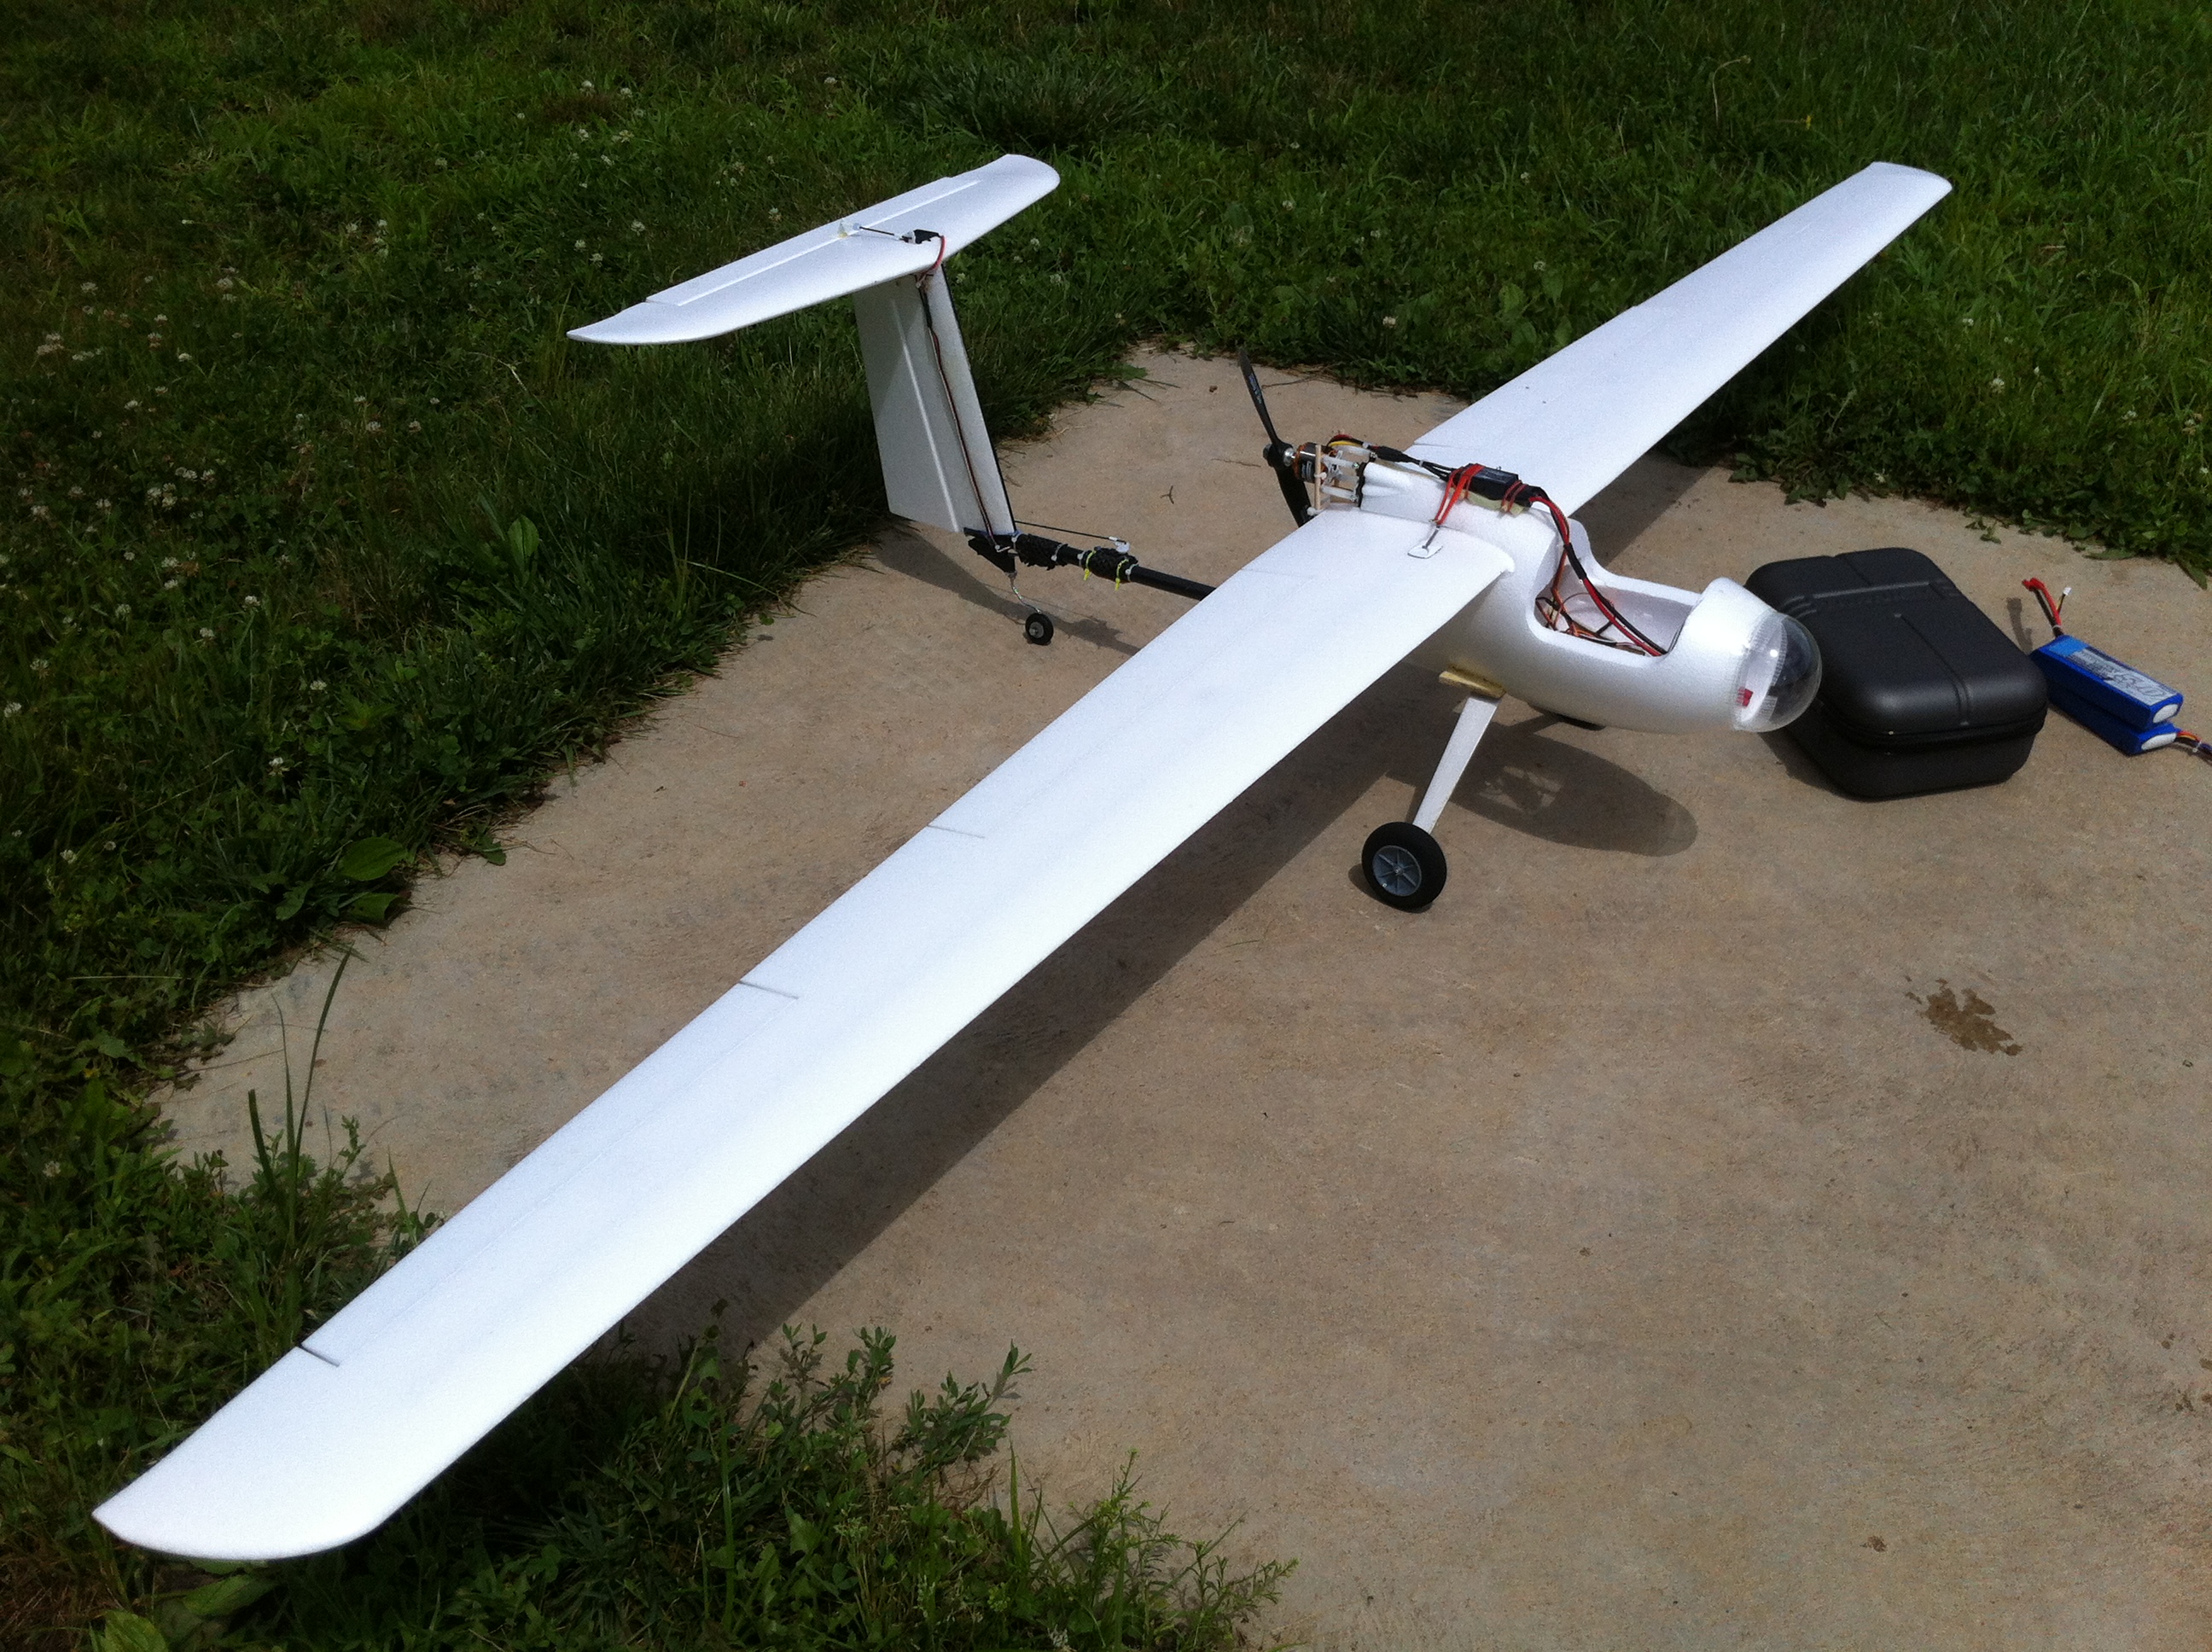
The Techpod Conservation Drone
Earlier this year, Wayne Garris from the Kickstarter project, HobbyUAV.com, donated two Techpods to ConservationDrones.org. I finally just had the time to build one up, equipped with an APM 2.5+ autopilot system.
This drone will be one of four that we will be bringing to Belize later this Summer. We are partnering with WCS to fly over Glover’s reef to explore the use of drones for patrolling marine protected areas.

While building this drone, I was quite concerned about the wing flex, even though I was assured by others that these 2.5 m wings are meant to flex!
I decided to add some rigidity to the wings by fiber-glassing them with an ultra thin glass fiber cloth by applying several coats of water-based polyurethane. The fiber-glassed wings definitely helped to reduce wing flex and prevent sudden dips in the air. (I know I did not do a perfect job of it, but I am happy just as long as it flies!)
After installing the APM 2.5+, receiver, telemetry and APM power module, there really wasn’t much space left inside the fuselage.
I created a battery holder using a piece of craft wood (pine), and a few pieces of velcro. This battery holder replaces the canopy, and can hold up to two 5000 mAh Turnigy batteries. The picture below also shows the location of the Turnigy Thrust 45 A ESC I used. I always prefer to place the ESC outside the fuselage to avoid overheating. The wings are held together mostly by friction at the wing joints, but further secured by several elastic bands hooked onto picture hangers on each wing. These picture hangers were glued to the wings with J-B Weld steel reinforced epoxy.
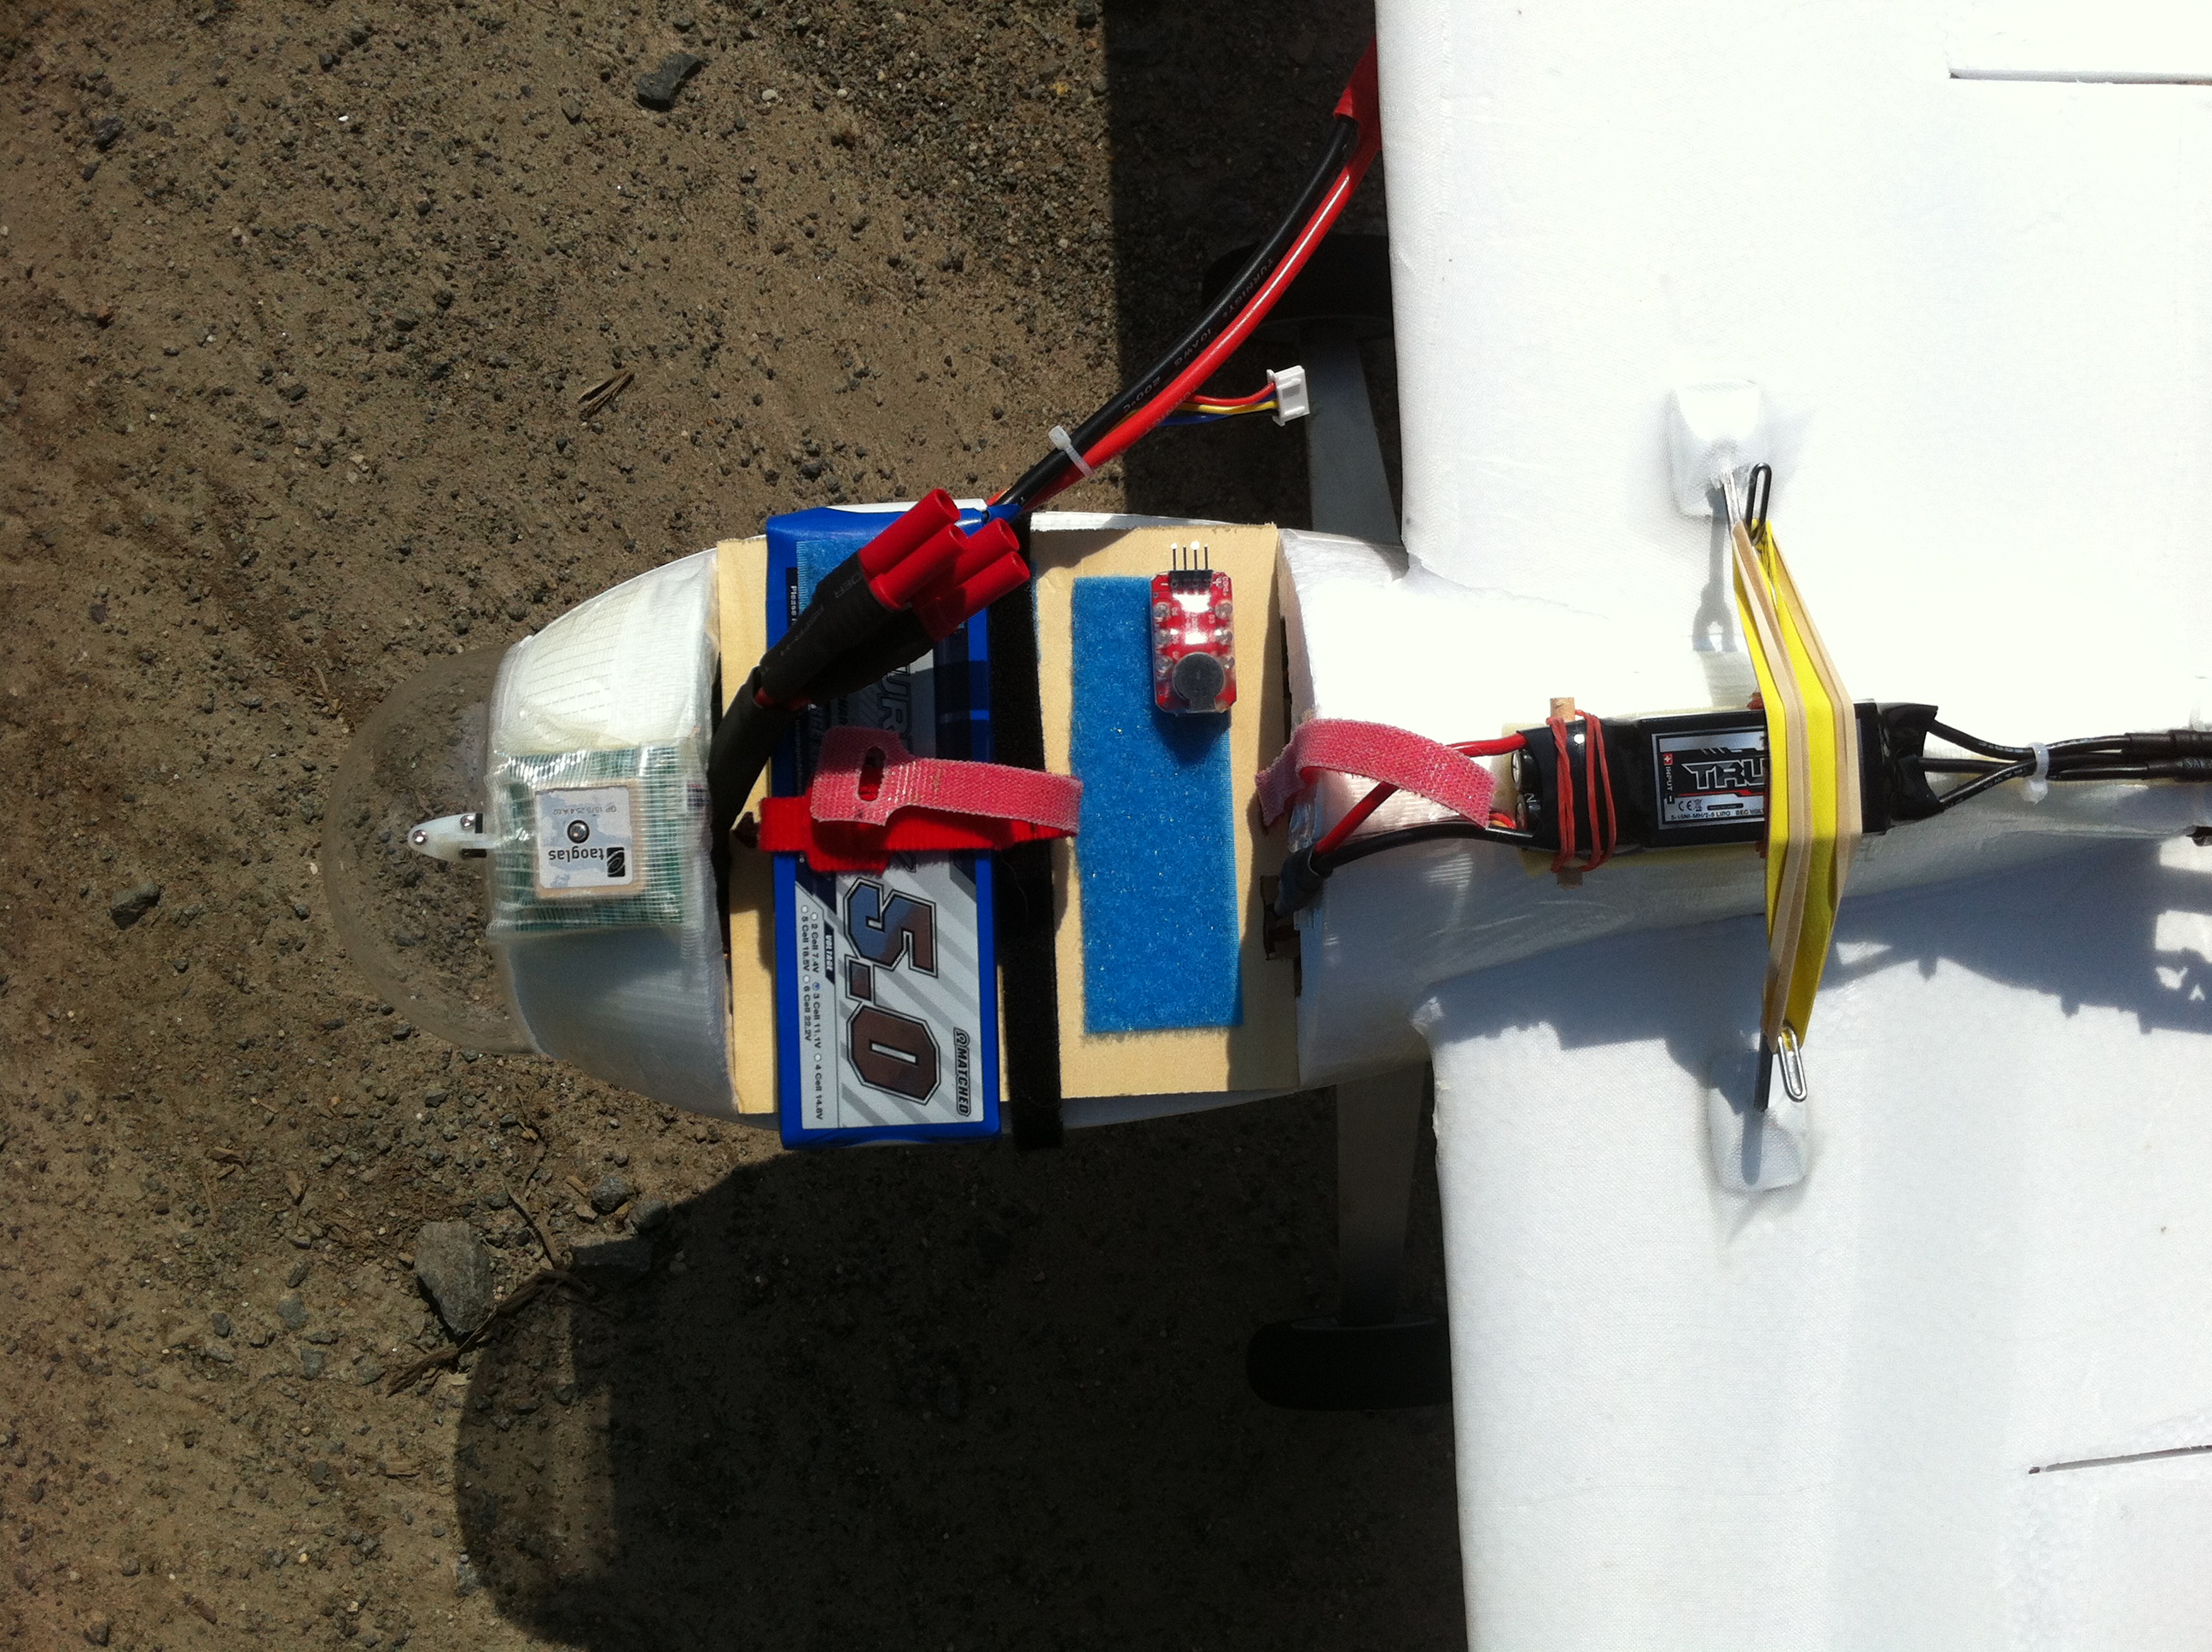
Battery holder for two 5000 mAh batteries.
At first, I wasn’t quite sure whether to glue the nose dome to the fuselage. In the end, I decided to improvise a hinge using control horns so that I can access the APM and receiver from the nose if needed.
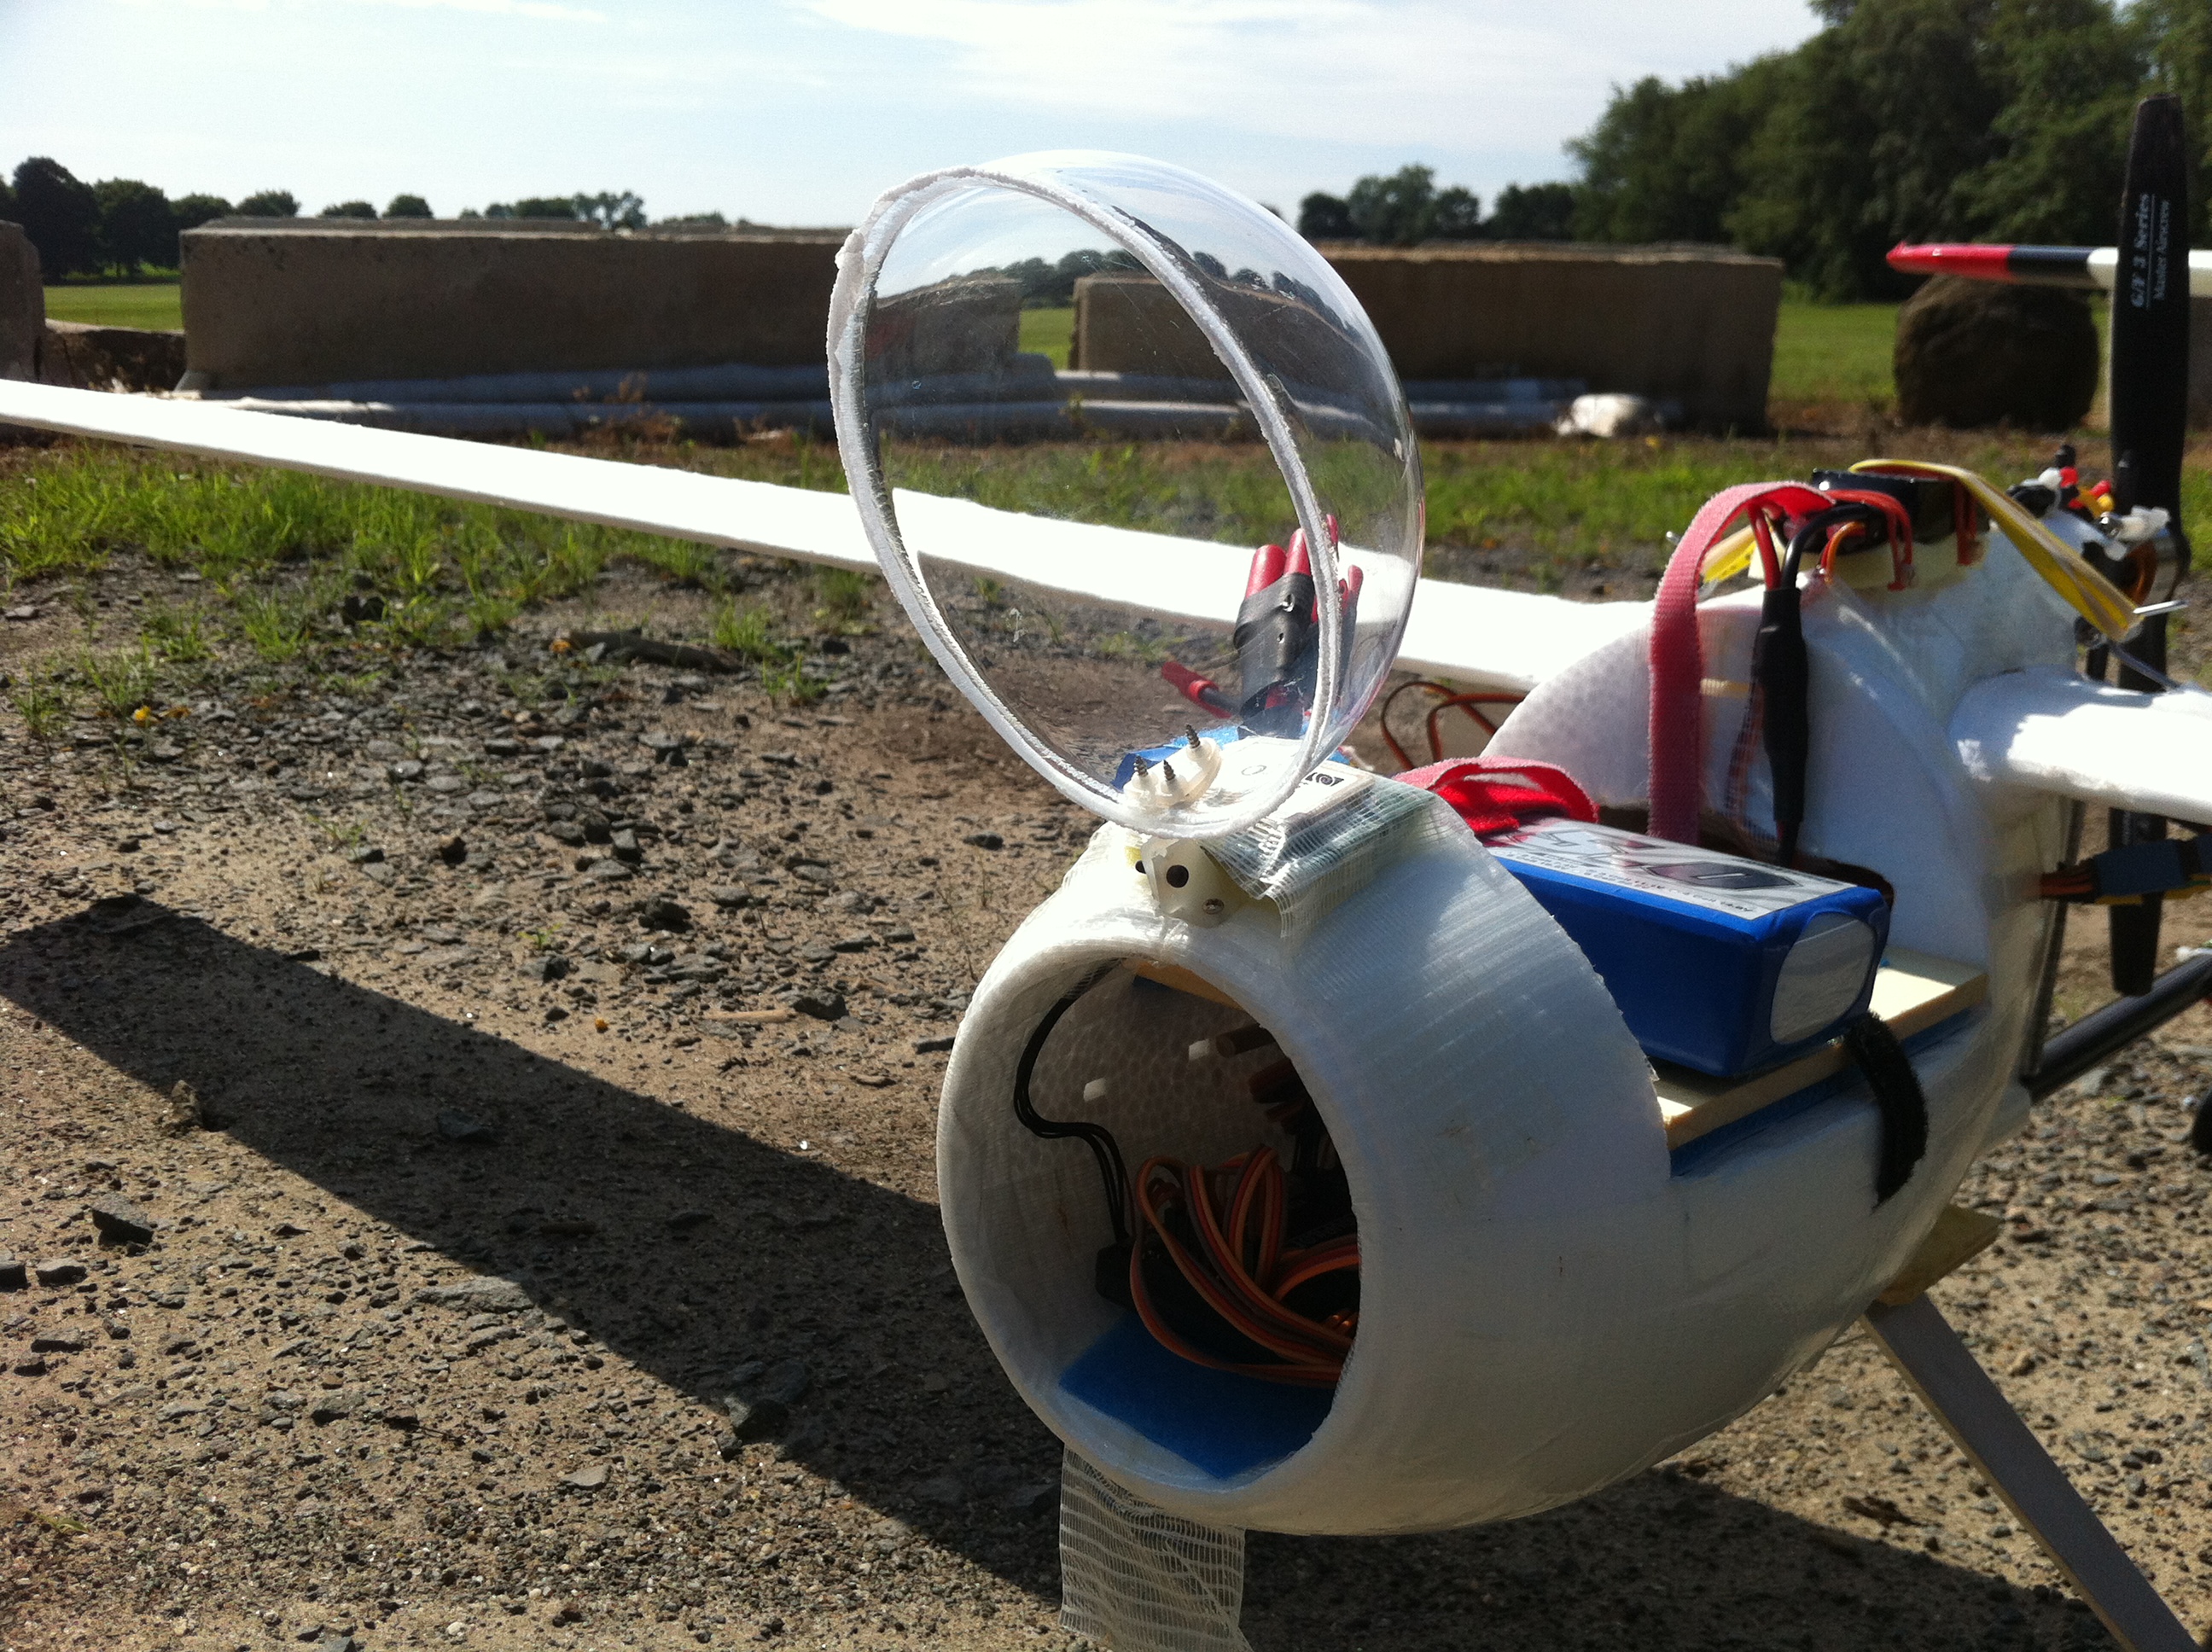
Nose dome with improvised hinge
The motor mount was given extra support from two 5 mm diameter wooden rods wrapped in shrink tubes, taped to the rear of the fuselage and zip-tied to the motor mount. I used a Turnigy 3536 1000 kv motor spinning a 11×7 2-bladed MasterAirscrew propeller. This combination provided about 1.6 kg of thrust, drawing about 30 A at 100% throttle. The All-Up-Weight (AUW) of this setup with one 5000 mAh battery is about 2.0 kg. This plane can cruise comfortably at 30-40% throttle drawing about 6-8 A. (I fly it with about 5 degrees flaps, which significantly improves lift without creating too much drag.)
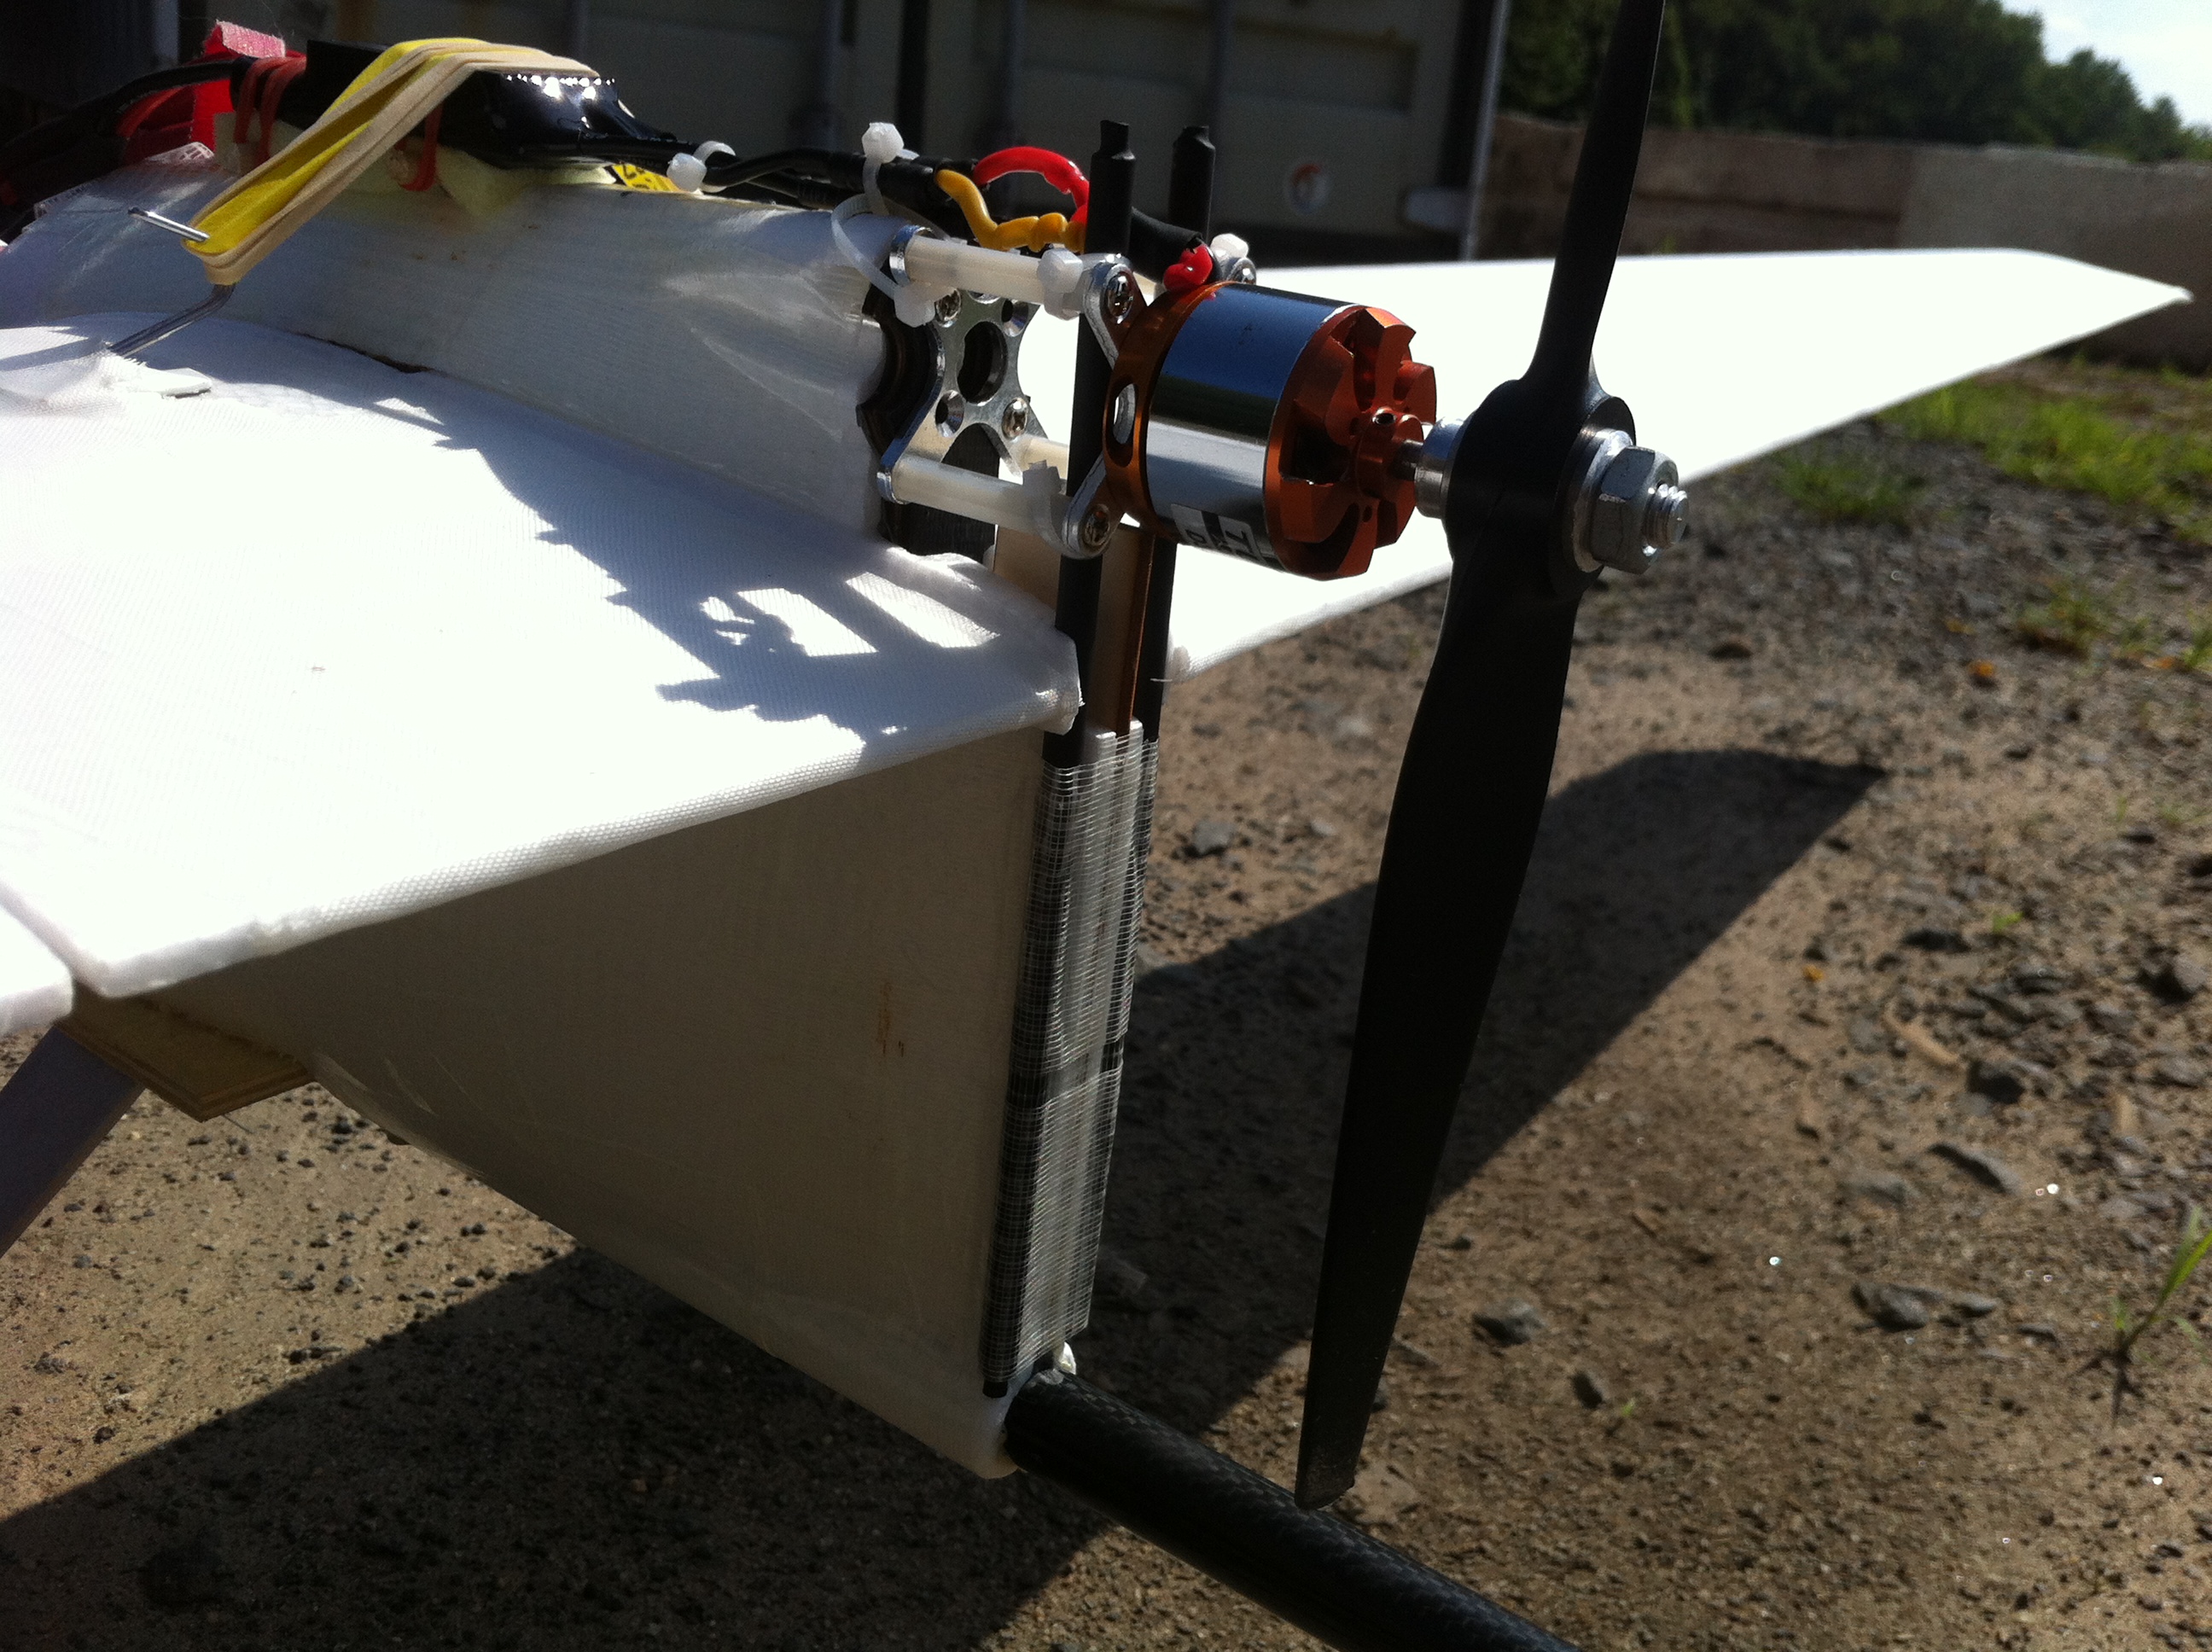
Motor mount supported by two wooden sticks.
The rudder servo was moved from underneath the fuselage to nearer the tail section. I used 22 g Corona digital metal gear servos for the rudder and elevator, and 11 g Turnigy metal gear servos for ailerons and flaps.
Rudder servo
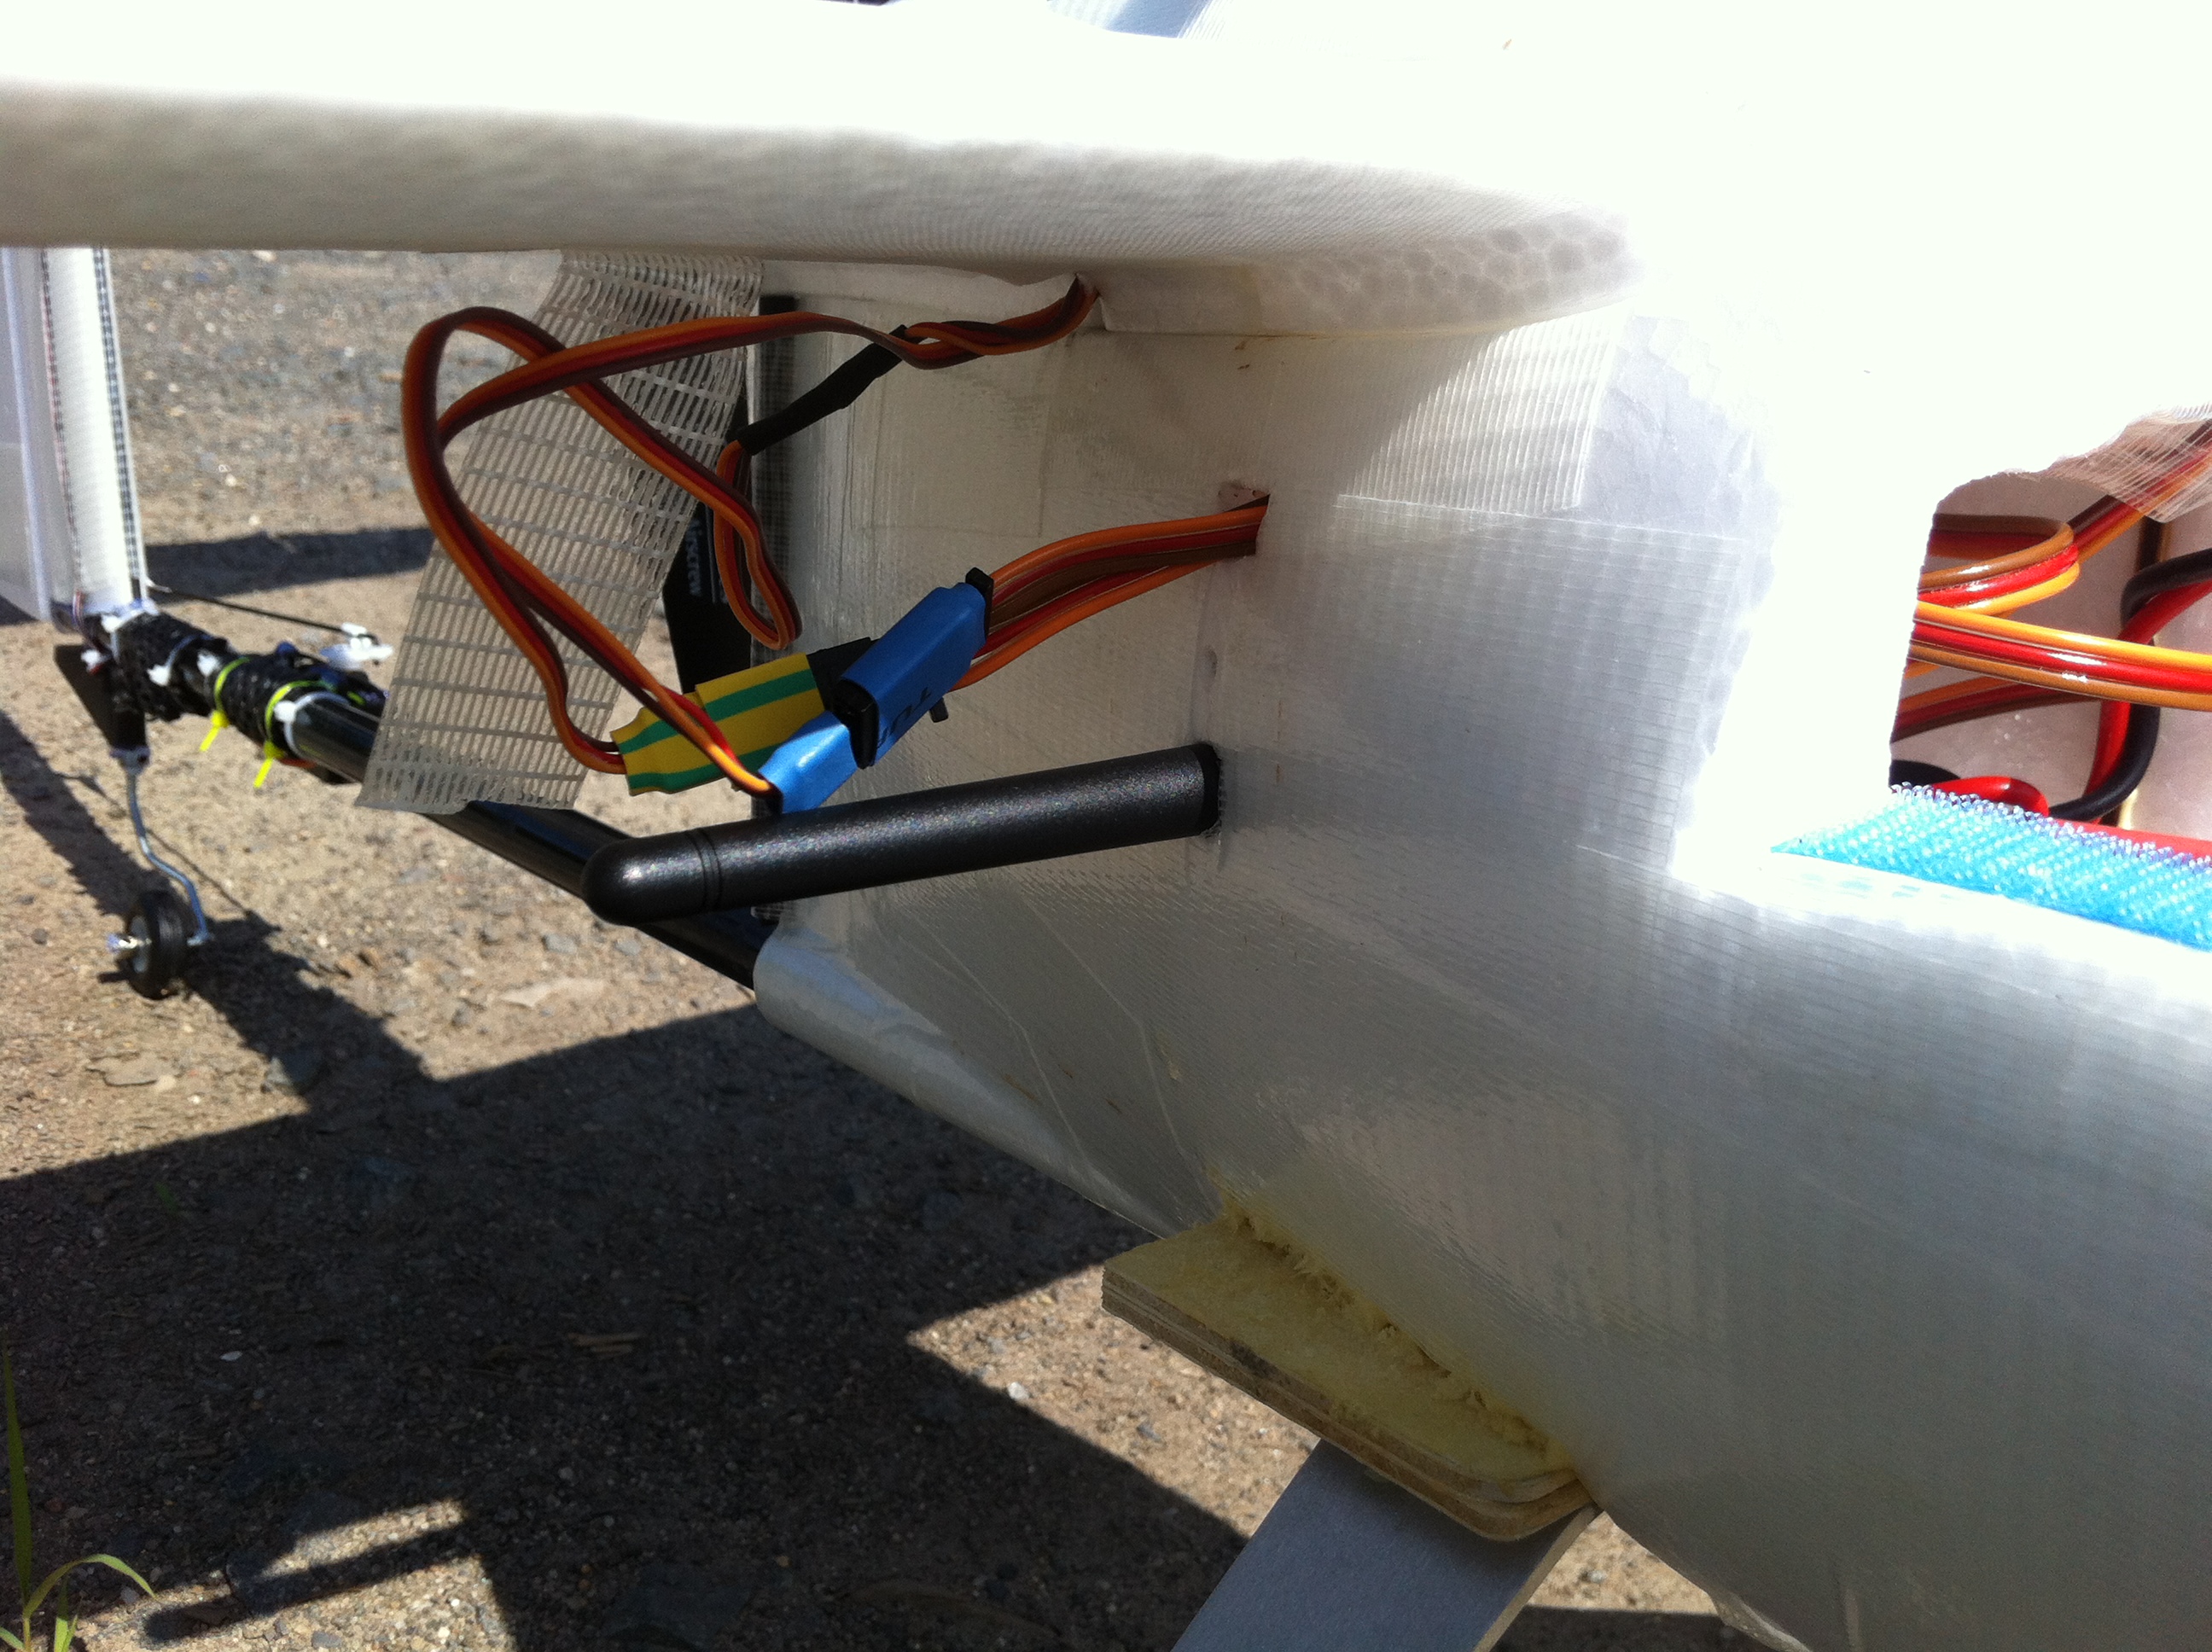
I don’t like fussing with aileron and flap connectors inside the limited fuselage space, and so decided to bring them outside. This makes wing assembly and disassembly in the field much easier. In this picture you can also see the antenna for the 3DR telemetry.
I installed front landing gear to a piece of plywood Gorilla-glued to the bottom of the fuselage (where the carbon fiber rod is exposed). The rear landing gear was screwed to the bottom of the tail section. These two screws also attach the vertical stabilizer to the carbon fiber rod. The horizontal stabilizer is attached to the vertical stabilizer by an improvised system of control horns and 1.5 mm carbon fiber rod. These mods make the Techpod completely modular and can be easily disassembled and packed back into its shipping box.
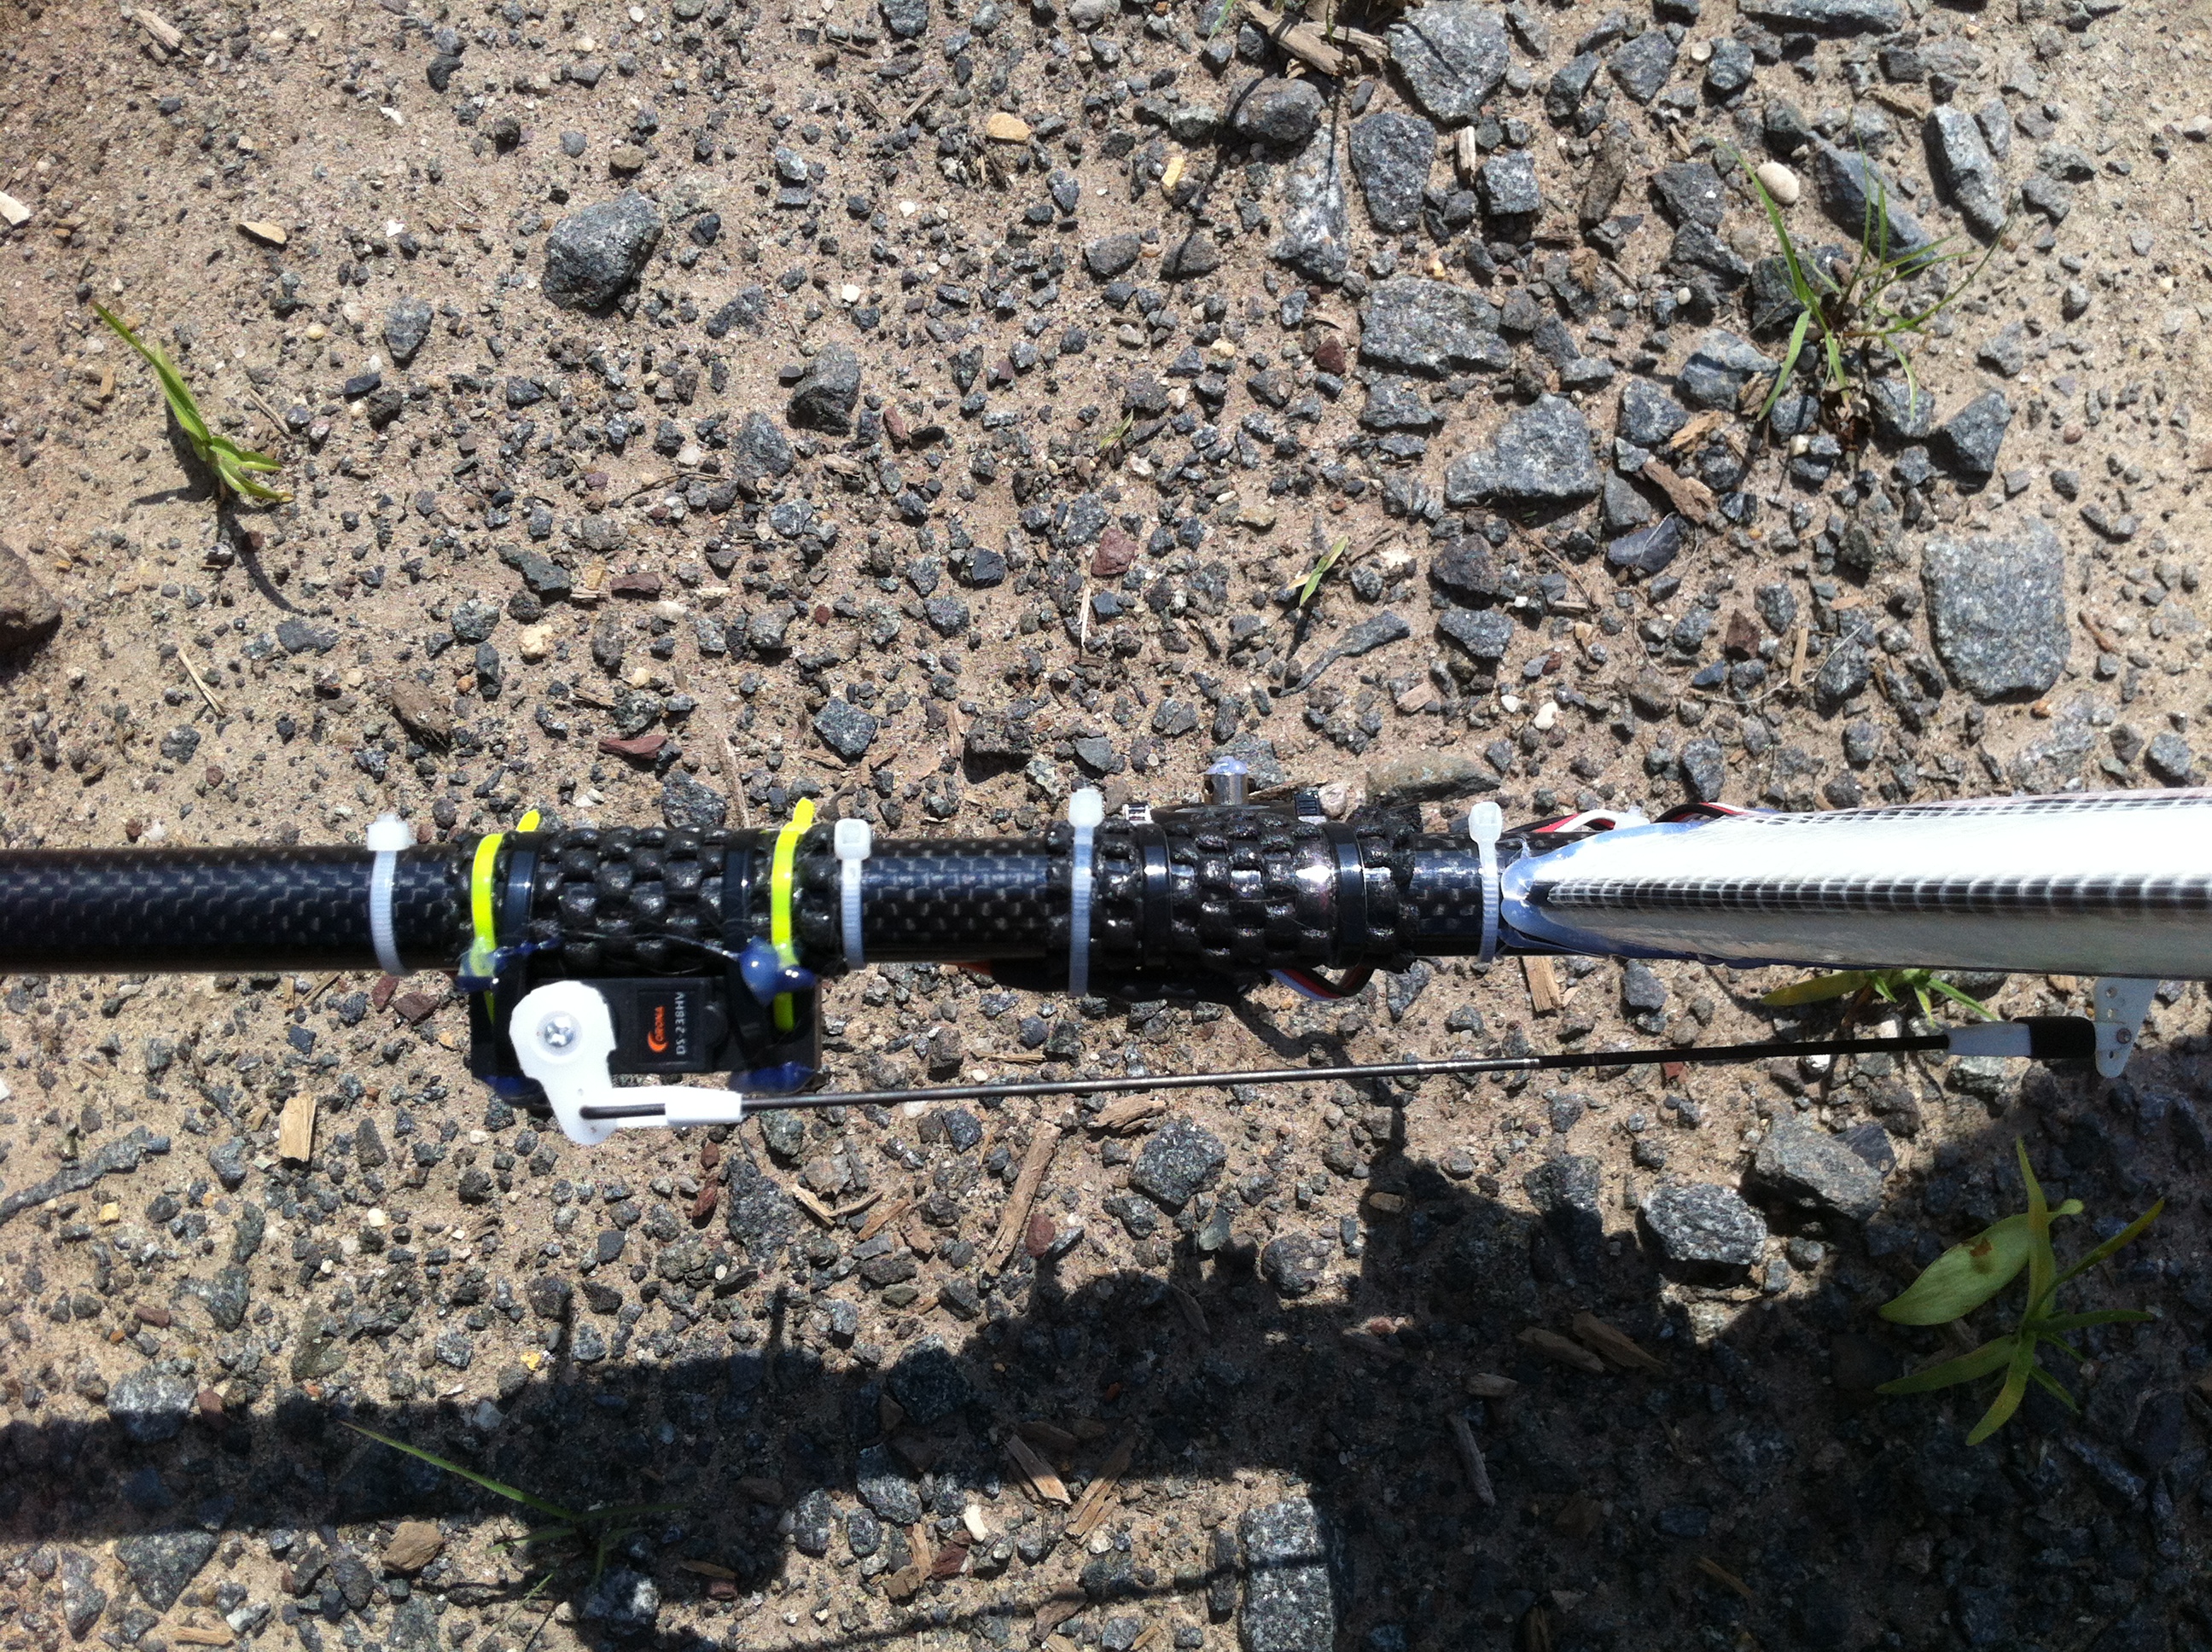
I improvised a camera mount by just attaching a 15 mm diameter carbon fiber rod to the main carbon fiber rod using a few pieces of zip-ties (cable ties). This system also allows me to adjust weight distribution to achieve optimal CG (85-90 mm from leading edge of wings).
During the maiden flight, I tested flight endurance by letting it fly in Return-To-Launch (RTL) mode. It did so mostly at a speed of 10-12 m/s at 30-40% throttle. At 50% battery capacity (of a single 5000 mAh battery) it had stayed in the air for about 18 minutes. So I estimate a flight time of 30 minutes (range of 21 km) with one battery and 50 minutes (36 km) with two batteries.
… Sneak Peek of the next Conservation Drone, based on the amphibious Icon A5!
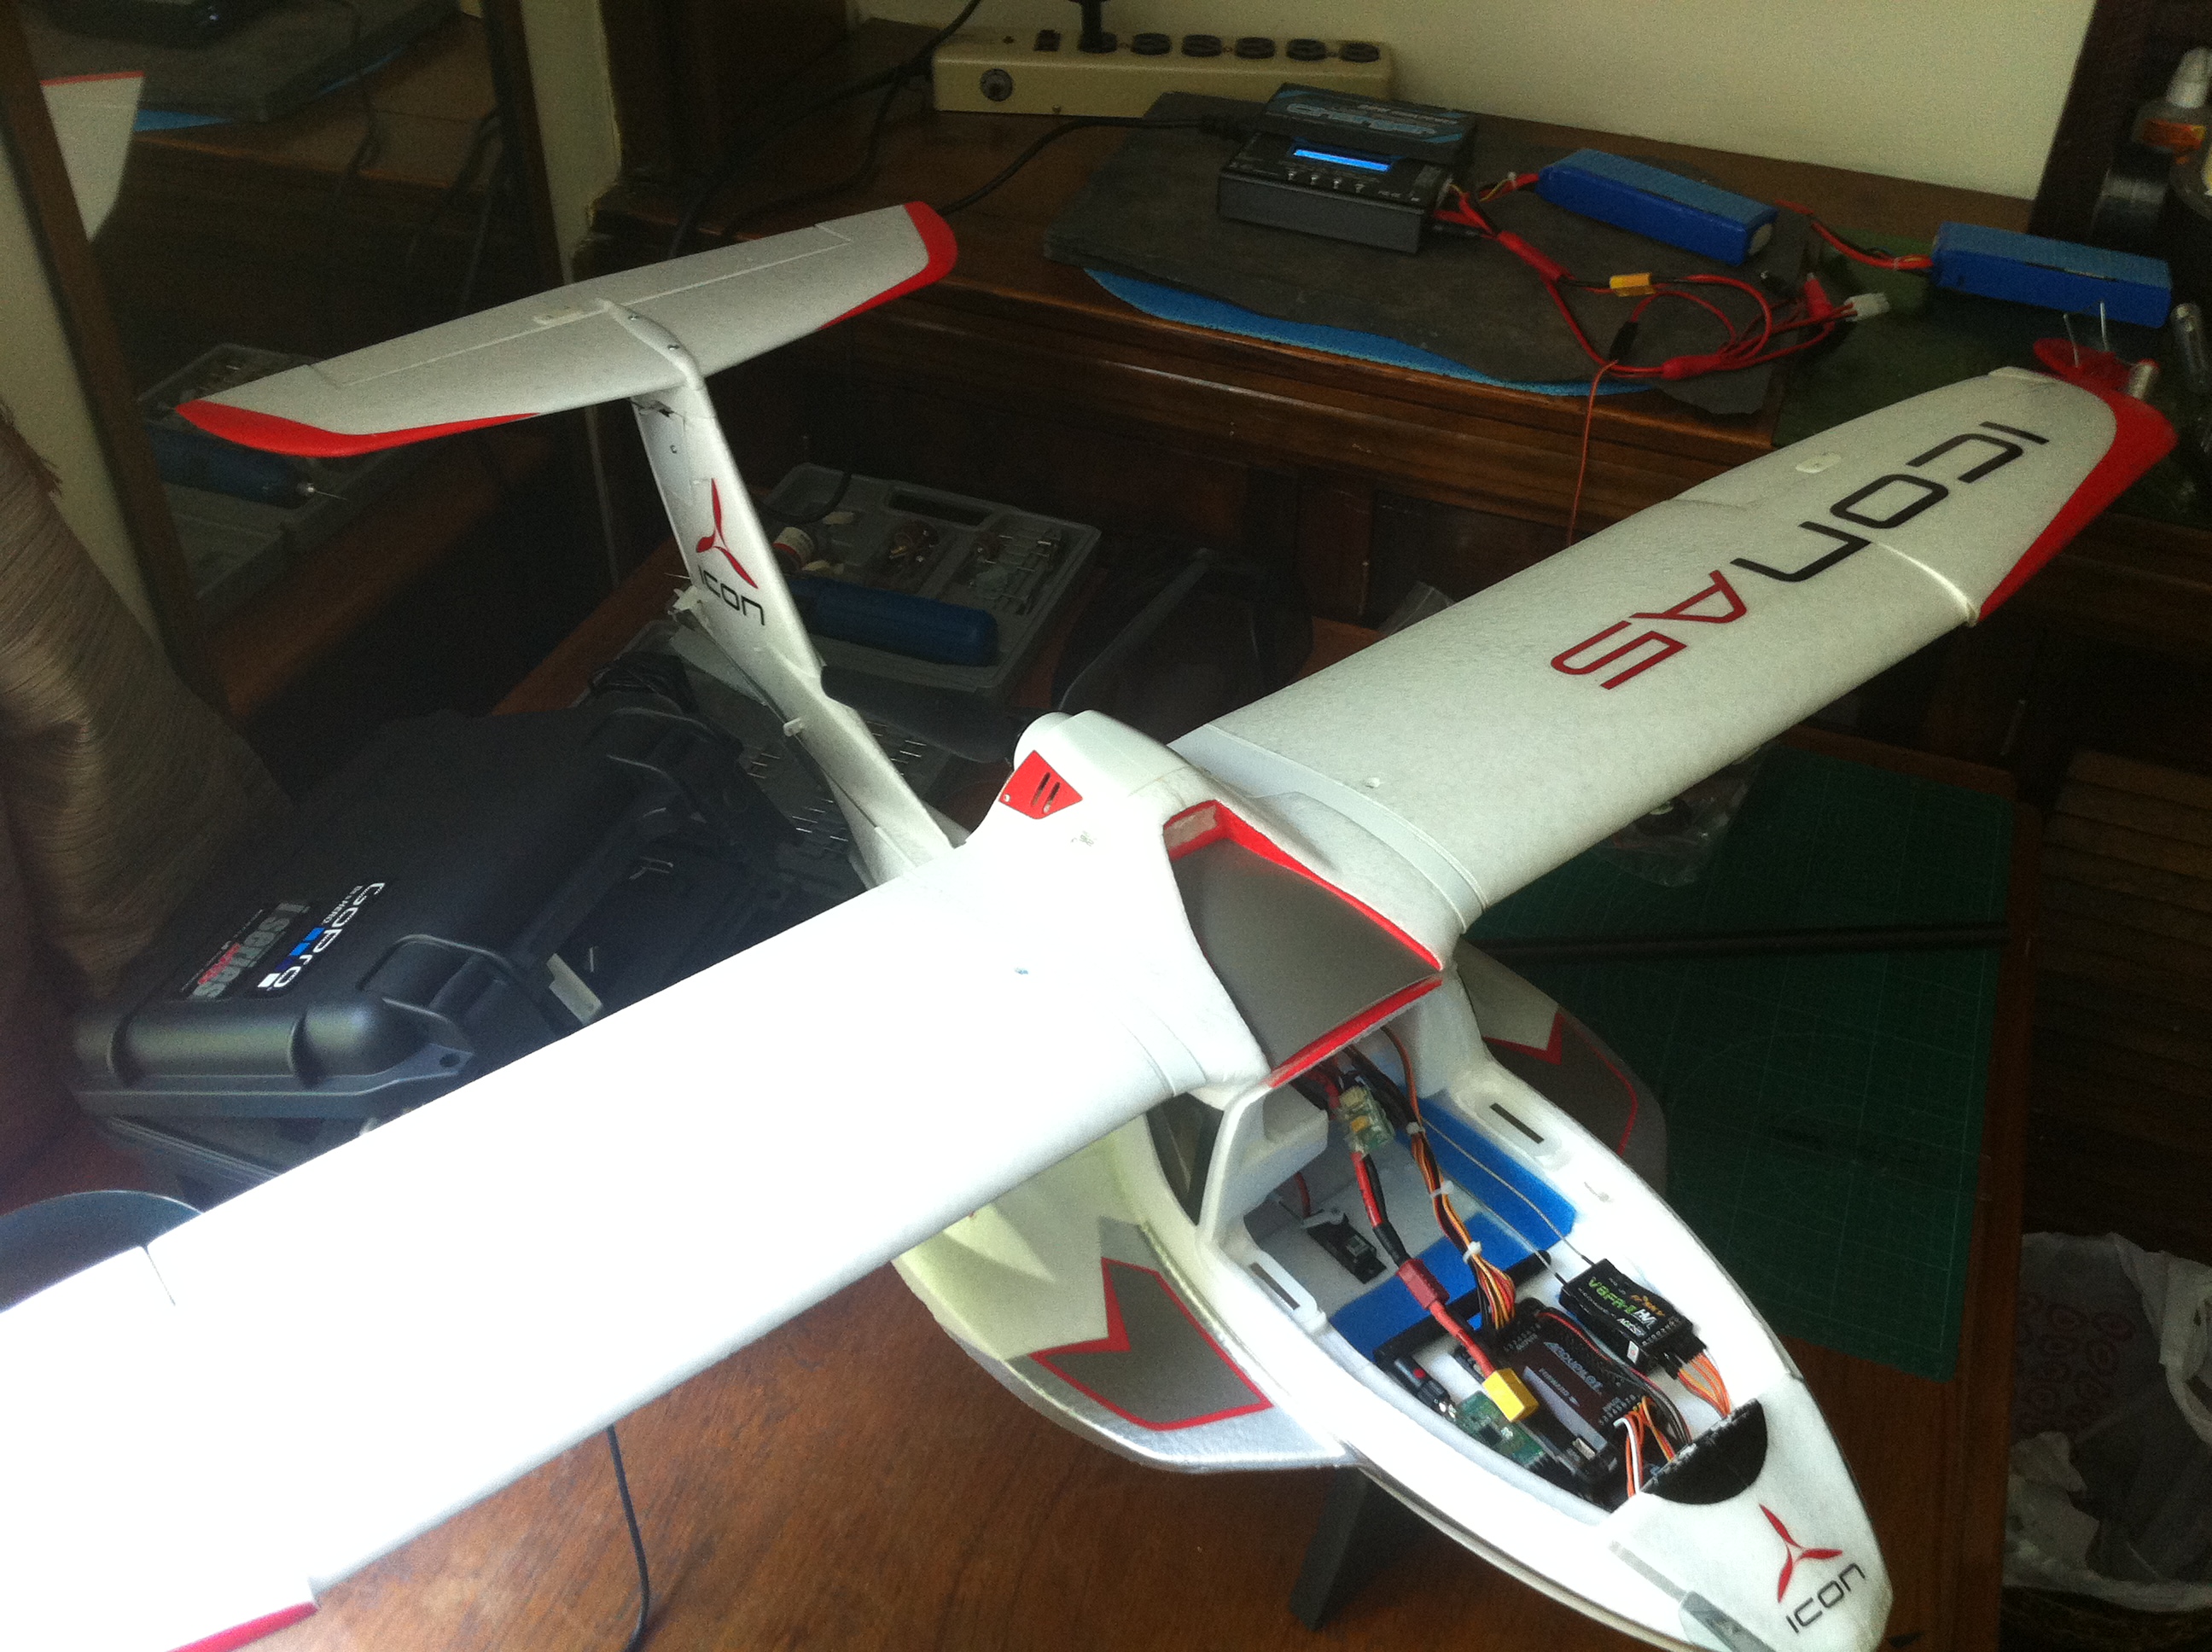
Amphibious Conservation Drone
Great stuff guys! I can’t wait to see the amphibious drone!
I just like the helpful info you provide in your articles.
I will bookmark your blog and test once more here
frequently. I’m relatively certain I’ll be informed plenty
of new stuff proper right here! Best of luck for the following!
Where could I find the front landing gear that you used on this? Could I get a link please? Thanks!
Hi Mike, we bought the landing gear from hobbyking.com.